
Adding a Headline
Headlines in The Print Shop are considered their own object type as they have additional effects and tools you can use with them.
To add a headline:
- On the Design Desk, Click on the Headline Button under Insert New Object from the sidebar

- A default Headline will appear on your project.
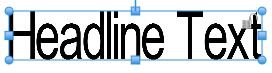
- Also by default the Headline Tab will be selected.

- To change the text of your Headline use the box in the Headline Tab.
Ready-Made Headline Style
Ready-Made headline styles are pre-made templates for you to use on your project. Many of the pre-made Headlines already have drop shadows and more of the advanced effects already applied to them.
To customize a headline:
- Add a Headline
- Click on the Ready-Made Headlines Button from the Headlines Tab

- Select the desired effect you want applied to your headline from the previews.

- To apply one of these effects to your Headline Click on the preview you like.
Note: You can scroll to the left or right using the arrows on the left or right hand side of the preview bar in order to see more options. You can also close the preview bar by clicking on the Red X in the top left corner of the preview bar.
On the Headlines tab you can also do the following:
- Edit the Headline text
- Select a Ready-Made Headline style
- Adjust the Shape of your Headline
- Change the Positions of the Letters
- Change the Proportions of the Lines in the Headline Box
- Set the Size of a Headline
- Change the Font
- Change the Color
- Set the Alignment
- Change the Text Direction
- Set the Padding / Kerning
- Change 3D Depth
- Add an Inner Outline
- Add an Outer Outline
- Change the Opacity
- Add a Border
- Add a Drop Shadow
- Blur the Headline
Click on a topic above to Continue...